Hey there! As a supplier of folder gluers, I've seen my fair share of situations where folks need to replace parts of these machines. Whether it's due to wear and tear or just a desire to upgrade, knowing how to replace the parts of a folder gluer is super important. In this blog, I'm gonna walk you through the whole process, step by step.
First off, let's talk about why you might need to replace parts. Over time, parts of a folder gluer can get worn out. The constant movement, the pressure, and the interaction with different materials can all take a toll. For example, the rollers that guide the paper or cardboard through the machine can start to lose their grip or get scratched, which can affect the quality of the folding and gluing. Also, the glue applicators can clog up or wear down, leading to uneven glue distribution.
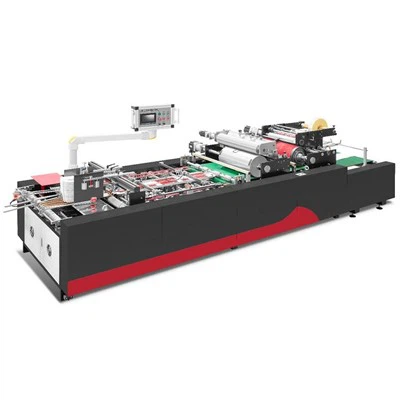
Now, before you start replacing any parts, you need to make sure you've got the right ones. Different folder gluers have different parts, so you need to know exactly what fits your machine. That's where our range of products comes in handy. We offer a variety of folder gluers, like the Flexible 900 Automatic High - Speed Folder Gluer, the Automatic Double - sided Adhesive Tape Gluing Machine, and the Flexible 700 Automatic High - Speed Folder Gluer. Each of these machines has its own set of parts, but we've got you covered with the right replacements.
The first step in replacing parts is to turn off the machine and unplug it. Safety first, right? You don't want any accidental starts while you're working on it. Then, you need to clean the area around the part you're going to replace. This helps prevent any dirt or debris from getting into the machine when you're taking the old part out and putting the new one in.
Let's say you're replacing a roller. Start by removing any guards or covers that are in the way. Usually, there are some screws or clips holding them in place. Once you've got access to the roller, you'll need to loosen the bolts or clamps that are holding it in position. Be careful not to drop any of these small parts!
After you've removed the old roller, take a good look at it. You can learn a lot from the old part. If it's worn out on one side more than the other, it could mean there's an alignment issue in the machine. Make sure you clean the area where the roller was sitting before you install the new one.


When you're installing the new roller, line it up properly. You want it to be in the exact same position as the old one. Tighten the bolts or clamps, but don't over - tighten them. You want the roller to be secure but still able to rotate smoothly.
If you're replacing a glue applicator, the process is a bit different. First, drain any remaining glue from the system. You don't want glue spilling everywhere when you're taking the applicator out. Then, disconnect the hoses or tubes that are attached to it. There might be some connectors that need to be unscrewed or snapped off.
Once the old applicator is out, clean the connectors and the area around them. The new glue applicator should come with some instructions on how to install it. Follow these carefully, making sure all the connections are tight and secure.
Another important part that might need replacing is the conveyor belt. To replace a conveyor belt, you'll need to remove the tension on it first. There are usually some tensioning mechanisms that you can adjust. Once the belt is loose, you can slide it off the rollers.
Before you put the new belt on, check the rollers for any damage or debris. Clean them if necessary. Then, carefully place the new belt on the rollers and adjust the tension so that the belt is tight enough to move the materials through the machine but not so tight that it puts too much stress on the rollers or the motor.
Throughout the whole process, it's a good idea to take pictures or make notes. This can help you if you run into any problems or if you need to refer back to how things were put together. And if you're not sure about something, don't hesitate to reach out to us. We've got a team of experts who can give you some advice.
After you've replaced the part, it's time to test the machine. Plug it back in and turn it on. Start it up slowly and watch how it operates. Check for any unusual noises, vibrations, or leaks. If everything looks and sounds good, you're all set!
Replacing parts of a folder gluer might seem a bit daunting at first, but with the right tools, the right parts, and a bit of patience, you can do it. And remember, we're here to support you every step of the way. Whether you need more information about our products or you're looking for some technical advice, we're just a message away.
If you're in the market for a new folder gluer or need to stock up on replacement parts, don't hesitate to get in touch. We can offer you the best solutions for your business needs. Let's work together to keep your folder gluing operations running smoothly.
References
- Industry knowledge and experience from working as a folder gluer supplier.
- Manufacturer's manuals for various folder gluers.