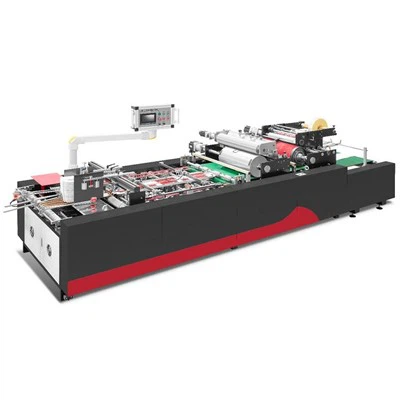
Hey there! As a supplier of Automatic Positioning Machines, I often get asked about how to adjust the positioning parameters of these nifty devices. It can seem a bit daunting at first, but once you get the hang of it, it's not as complicated as it might seem. In this blog post, I'll walk you through the process step by step, so you can get the most out of your Automatic Positioning Machine.
Understanding the Basics
Before we dive into the adjustment process, it's important to have a basic understanding of how an Automatic Positioning Machine works. These machines are designed to accurately position objects in a specific location, whether it's for assembly, packaging, or other industrial applications. They use a combination of sensors, motors, and control systems to achieve precise positioning.
The positioning parameters of an Automatic Positioning Machine typically include things like the position, speed, acceleration, and deceleration of the moving parts. These parameters can be adjusted to optimize the performance of the machine for different tasks and materials.
Step 1: Familiarize Yourself with the Machine
The first step in adjusting the positioning parameters of an Automatic Positioning Machine is to familiarize yourself with the machine's control panel and user interface. Each machine is different, so it's important to read the user manual and understand how to navigate the control system.
Most Automatic Positioning Machines have a touchscreen or a set of buttons and dials that allow you to input and adjust the positioning parameters. Some machines also have a built-in diagnostic system that can help you troubleshoot any issues that may arise.
Step 2: Set the Initial Parameters
Once you're familiar with the machine's control panel, the next step is to set the initial positioning parameters. This typically involves setting the starting position, the target position, and the speed and acceleration of the moving parts.
To set the starting position, you'll need to move the machine's moving parts to the desired location and then input the coordinates into the control system. The target position is the location where you want the object to be positioned, and you'll need to input the coordinates for this as well.

The speed and acceleration of the moving parts can be adjusted to optimize the performance of the machine for different tasks. For example, if you're working with a heavy object, you may need to set a lower speed and acceleration to prevent the machine from overloading.
Step 3: Calibrate the Sensors
The sensors on an Automatic Positioning Machine are used to detect the position and movement of the moving parts. To ensure accurate positioning, it's important to calibrate the sensors regularly.
Calibrating the sensors typically involves moving the machine's moving parts to a known position and then adjusting the sensor settings to ensure that the readings are accurate. This process may need to be repeated several times to ensure that the sensors are calibrated correctly.
Step 4: Test the Machine
Once you've set the initial parameters and calibrated the sensors, it's time to test the machine. Start by running a few test cycles to make sure that the machine is positioning the objects accurately.
If you notice any issues with the positioning, you may need to adjust the parameters further. This could involve adjusting the speed, acceleration, or the starting and target positions.
Step 5: Fine-Tune the Parameters
After testing the machine, you may need to fine-tune the positioning parameters to optimize the performance of the machine for your specific application. This could involve adjusting the parameters based on the type of material you're working with, the size and weight of the objects, and the required accuracy of the positioning.

It's important to make small adjustments to the parameters and test the machine after each adjustment to ensure that you're moving in the right direction. This process may take some time, but it's worth it to ensure that the machine is performing at its best.
Examples of Our Automatic Positioning Machines
At our company, we offer a range of Automatic Positioning Machines to meet the needs of different industries. Here are some examples of our products:
- LS-900C Bi-channel Visual Positioning Machine: This machine is designed for high-precision positioning applications. It uses a bi-channel visual system to accurately detect the position of objects and can be used for a variety of tasks, such as assembly, packaging, and inspection.
- MC-SY-380 Screen Gluing Machine: This machine is specifically designed for screen gluing applications. It uses an Automatic Positioning System to ensure that the screens are glued accurately and can be used for a variety of screen sizes and shapes.
- LS-850A Automatic Paper Gluing Machine: This machine is used for paper gluing applications. It uses an Automatic Positioning System to ensure that the paper is glued accurately and can be used for a variety of paper sizes and thicknesses.
Conclusion
Adjusting the positioning parameters of an Automatic Positioning Machine is an important part of ensuring that the machine is performing at its best. By following the steps outlined in this blog post, you can adjust the parameters to optimize the performance of the machine for your specific application.
If you're interested in learning more about our Automatic Positioning Machines or have any questions about adjusting the positioning parameters, please don't hesitate to contact us. We'd be happy to help you find the right machine for your needs and provide you with the support you need to get the most out of it.

References
- Manufacturer's user manual for Automatic Positioning Machines
- Industry best practices for adjusting positioning parameters