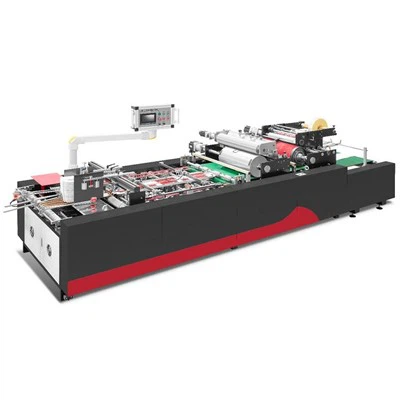
Hey there! If you're in the business of making rigid boxes, you know how crucial it is to have a top - notch rigid box grooving machine. As a supplier of these amazing machines, I've had my fair share of experiences with installation. So, let's talk about what it takes to install a rigid box grooving machine.
Location, Location, Location
First off, picking the right spot for your machine is super important. The area where you plan to install the machine should be spacious. You don't want to cram it into a tiny corner. A cramped space can make it difficult to operate the machine and also pose safety risks. The machine needs enough room for operators to move around freely, access all its parts, and for any maintenance work that might come up.
The floor where the machine will be placed must be level. An uneven floor can cause the machine to vibrate excessively during operation. This not only affects the quality of the grooving but can also lead to premature wear and tear of the machine's components. You might need to use shims or levelers to adjust the machine's position if the floor isn't perfectly flat.
The installation area should also be well - ventilated. Rigid box grooving machines generate heat during operation, and proper ventilation helps dissipate this heat. It also prevents the buildup of fumes and dust that can be harmful to the operators and the machine itself. You don't want a stuffy environment that could cause the machine to overheat or the air quality to drop.
Power Supply
Getting the power supply right is a make - or - break factor for your machine's installation. You need to ensure that the power source can provide the correct voltage and current that the machine requires. Different models of rigid box grooving machines have different power requirements, so it's essential to check the machine's manual.
A stable power supply is crucial. Fluctuations in voltage can damage the machine's electrical components. You might want to consider using a voltage stabilizer to protect the machine from sudden power surges or drops. This will not only extend the lifespan of the machine but also ensure consistent performance.
Also, make sure that the electrical wiring is properly installed and meets all the safety standards. Faulty wiring can lead to electrical hazards such as short circuits or electric shocks. It's always a good idea to have a professional electrician handle the electrical connections.
Machine Assembly
When it comes to assembling the rigid box grooving machine, following the manufacturer's instructions is key. These instructions are there for a reason, and skipping steps or doing things out of order can lead to problems.
The machine usually comes in parts, and you'll need to put them together carefully. Some components might be heavy, so you'll need proper lifting equipment to avoid injuries. Make sure all the bolts, nuts, and screws are tightened to the specified torque. Loose connections can cause vibrations and affect the machine's performance.
During the assembly process, check all the moving parts to ensure they are properly lubricated. Lubrication reduces friction between the parts, which in turn reduces wear and tear and improves the machine's efficiency. You should also check the alignment of the cutting and grooving tools. Misaligned tools can result in poor - quality grooving and may even damage the machine.
Testing and Calibration
Once the machine is assembled and connected to the power supply, it's time for testing and calibration. Start by running the machine at a low speed to check for any abnormal noises or vibrations. If you hear any strange sounds, it could indicate a problem with the assembly or a faulty component.
Calibration is crucial to ensure that the machine grooves the boxes accurately. You'll need to adjust the depth, width, and spacing of the grooves according to your requirements. Use precision measuring tools to make these adjustments. This might take a bit of trial and error, but getting it right is essential for producing high - quality rigid boxes.
Test the machine with some sample boxes to see if the grooving meets your standards. If there are any issues, go back and make the necessary adjustments. It's better to iron out all the kinks during the testing phase rather than having problems during full - scale production.
Training for Operators
Even the best - installed machine won't perform well if the operators don't know how to use it properly. Provide comprehensive training for your operators. They should be familiar with all the functions of the machine, including how to start and stop it, adjust the settings, and perform basic maintenance tasks.
Training should also cover safety procedures. Operators need to know how to use personal protective equipment such as goggles, gloves, and earplugs. They should also be aware of the potential hazards associated with the machine and how to avoid them.
Our Machines
We offer a range of top - quality rigid box grooving machines, such as the LS - F7 Smart Rigid Box Making Machine, the LS - 1246E Automatic Rigid Box Making Machine, and the LS - 900A Bi - channel Fully Automatic Rigid Box Making Machine. These machines are designed with the latest technology to ensure high - precision grooving and efficient operation.


If you're interested in any of our machines or have questions about the installation requirements, don't hesitate to get in touch. We're here to help you every step of the way, from choosing the right machine to getting it up and running smoothly. Whether you're a small - scale business or a large - scale manufacturer, we have the perfect solution for your rigid box grooving needs. Reach out to us today to start a conversation about your requirements and how we can assist you in taking your rigid box production to the next level.
References
- Manufacturer's manuals for rigid box grooving machines
- Industry standards for machine installation and operation